Week 3 - 3D Printing
This week assignment was about creating 3d Model and than 3d printing it. For this we should include a technique for a model, that can be only used by Additive methods. Most of the methods solved additive are cause by structures inside structures, which cant be reach by a mile. This also includes element that are enclosed inside a structure. Base on this knowledge I designed a 3d model in “Blender”.I took inspiration for this 3d model from byzantine styled church towers.
I began creating an object by creating a low poly sphere with 8 Segments. I than edit in the Edit Mode the top side of the sphere with the scaling tool limited to the z-Axis down to a flat surface.
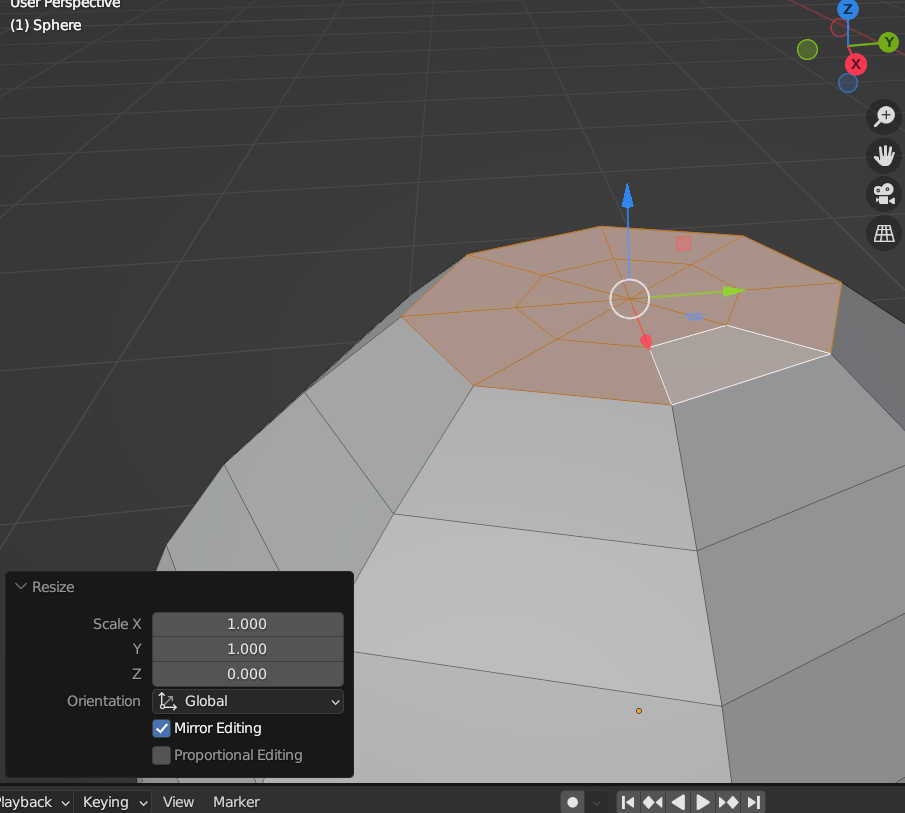
I used this surface to extrude the surface inside the sphere creating a hole in the top. I than scaled the inner faces in the xy direction to create a bigger body for a tower.
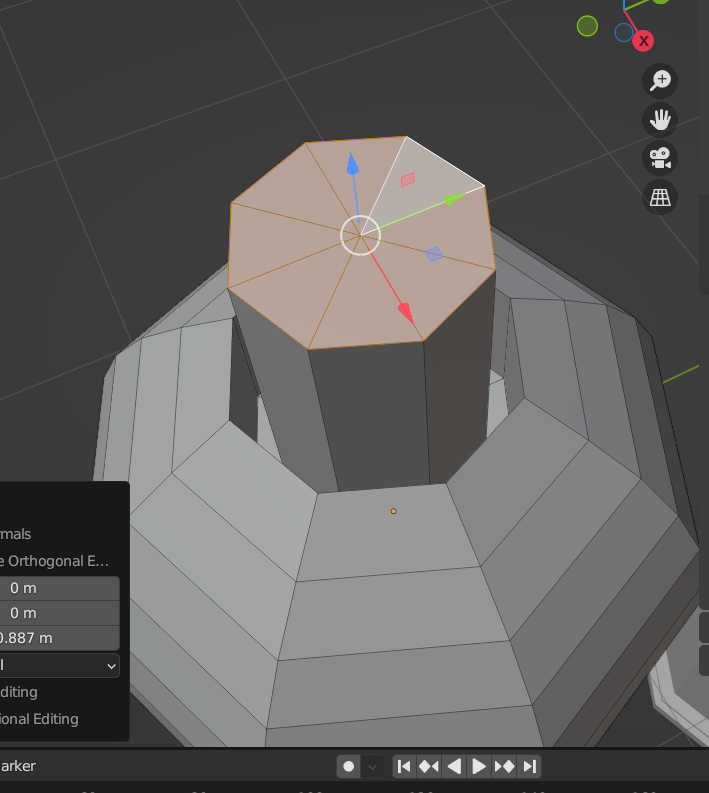
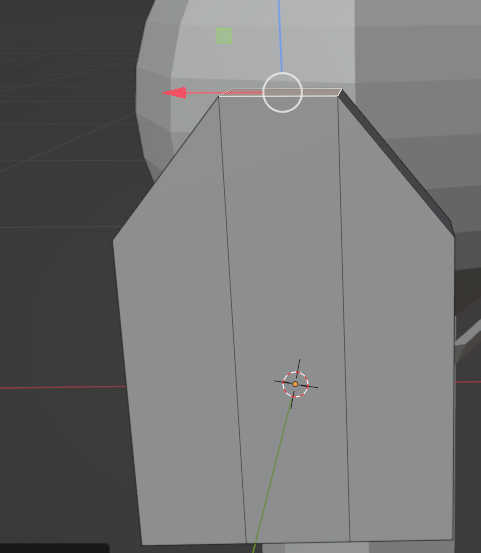
I used the bevel tool to round the edge and create a flat surface for the church roof. For the bottom part of the tower i than proceed delete the faces on the bottom of the sphere and extrude the left over Edge to the bottom. I than filled in the extrude edges with a new Face at the bottom creating the base of the tower.
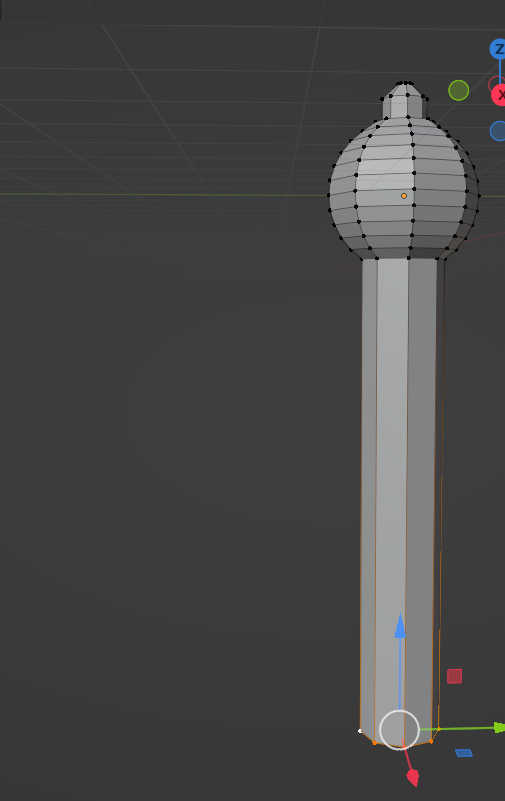
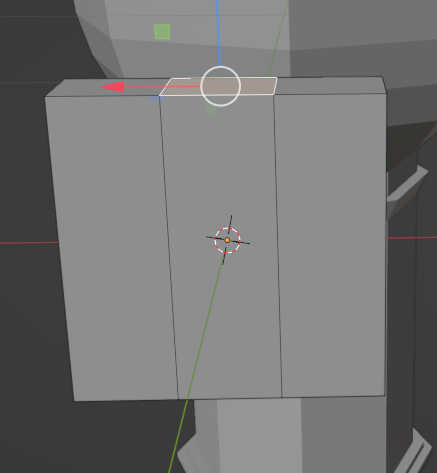
Using loop Cuts at the base I created the face size for each Cornice like overhangs. By selecting the new faces, extrude and scale directly after it in xy direction, the overhangs will be created. Creating some variation with the overhangs, like a triangle profile by scaling the lower edge of an overhang back to the base and merging the vertices. Or creating an overhang on an overhang by loop-cuting a smaller face and extruding it the same way as the overhangs before.


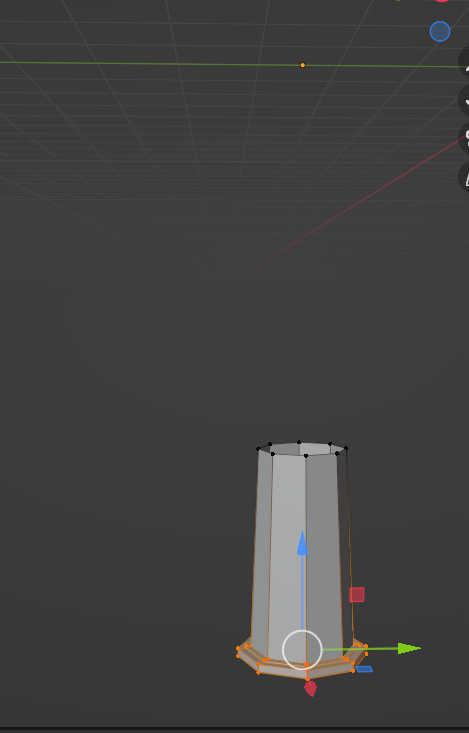
Because most towers have a bigger bottom radius scale than the top, I needed to scale the bottom of the base. By only selecting the bottom pedestal and scaling on xy it the base becomes wider.
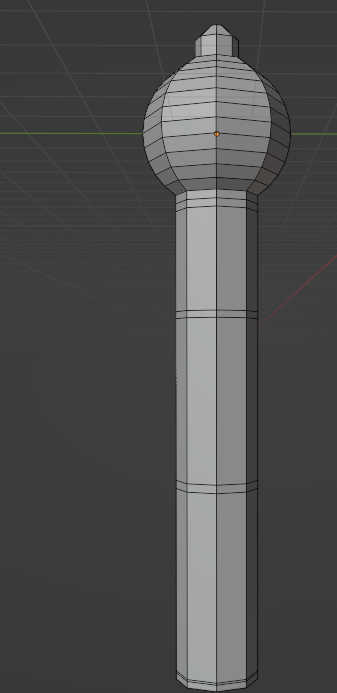
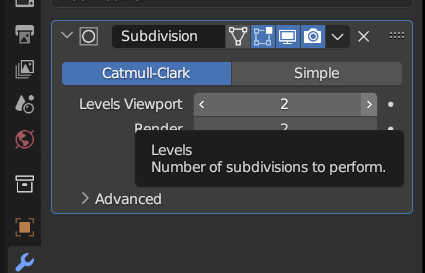
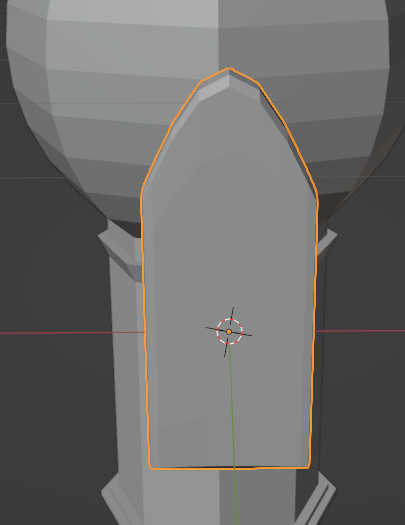
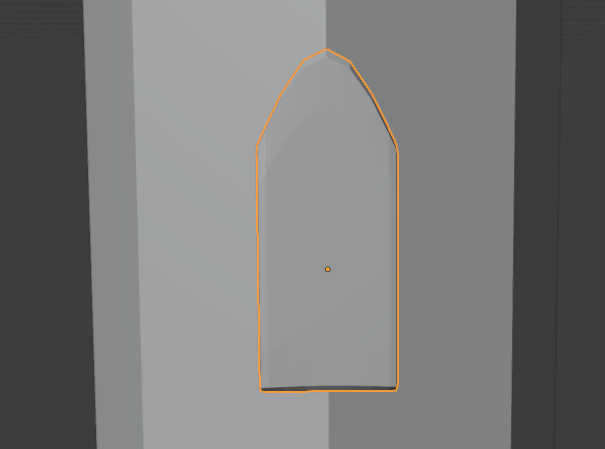
The next editing method used a based on the blender featured object modifiers, which manipulates the created mesh. To create the window shape I created a 3d window form which I used to cut a hole inside the tower. I created a box and scaled it to the wanted shape and applied the scale. Than I made 2 loop-cuts and moved the face in the center upwars to create a low poly round shape at the top of the box.
I than applied a subdivions surface modifier to round the top. By increasing the viewport level it increases the “resolution” of the round shape. With loop cut it can be controlled which edges are hard an which edges are soft.
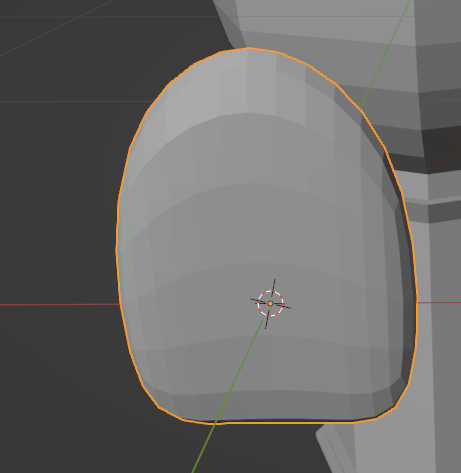

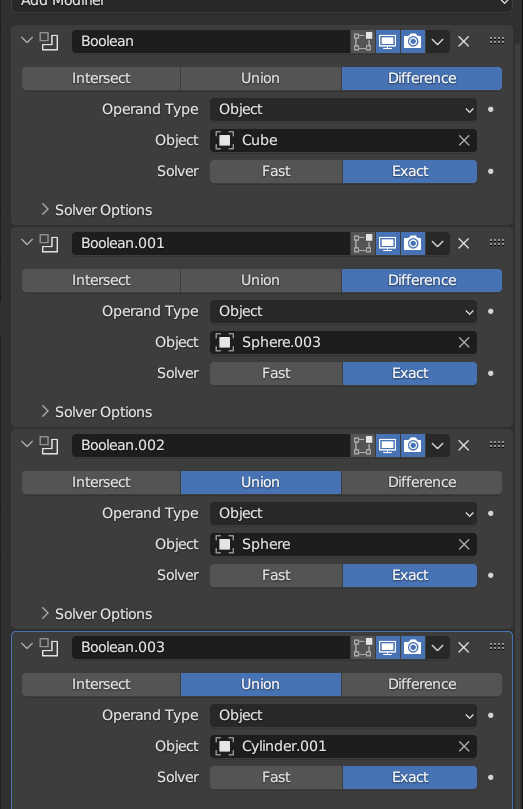
Because the window height or length were to wide, I scaled it in x in z direction to get the wanted form and applied the scale. Place the window at the wanted position by snapping the point of the window to the tower. If the window isn’t aligned with to face, than you have to rotate it. To cut out the windows I used a boolen object modifier with the tower set to difference and selected the window.
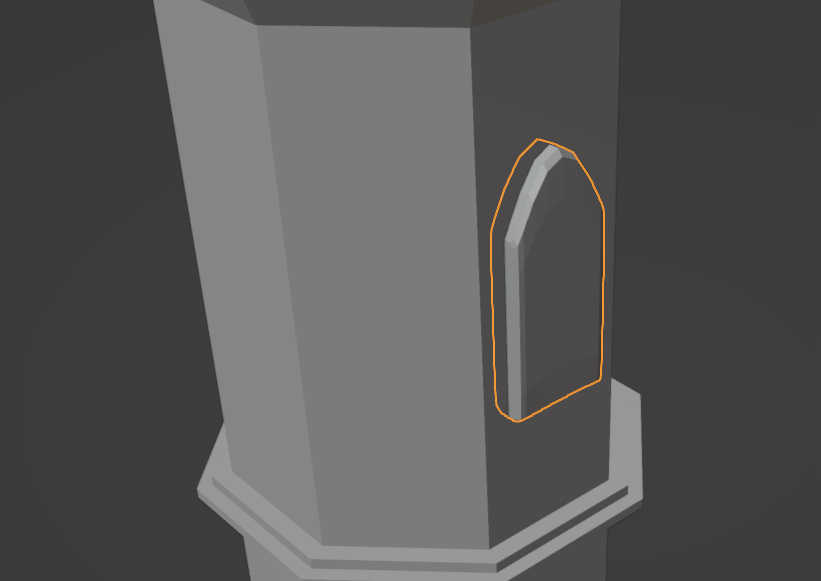
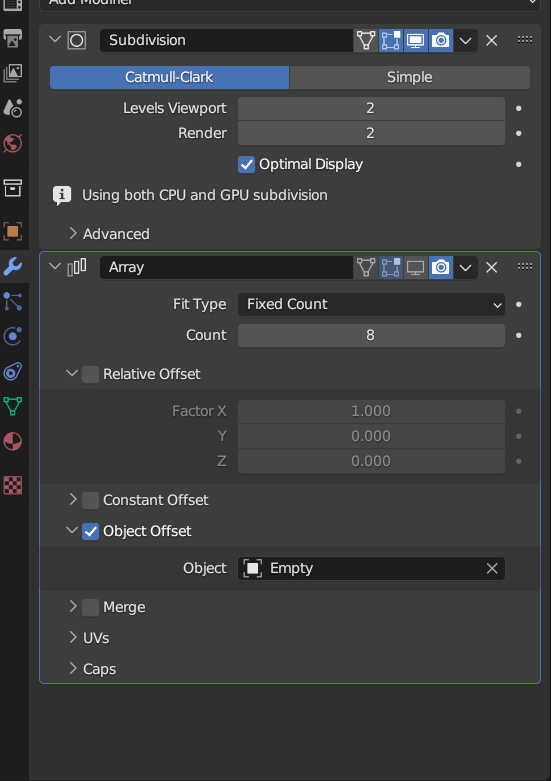
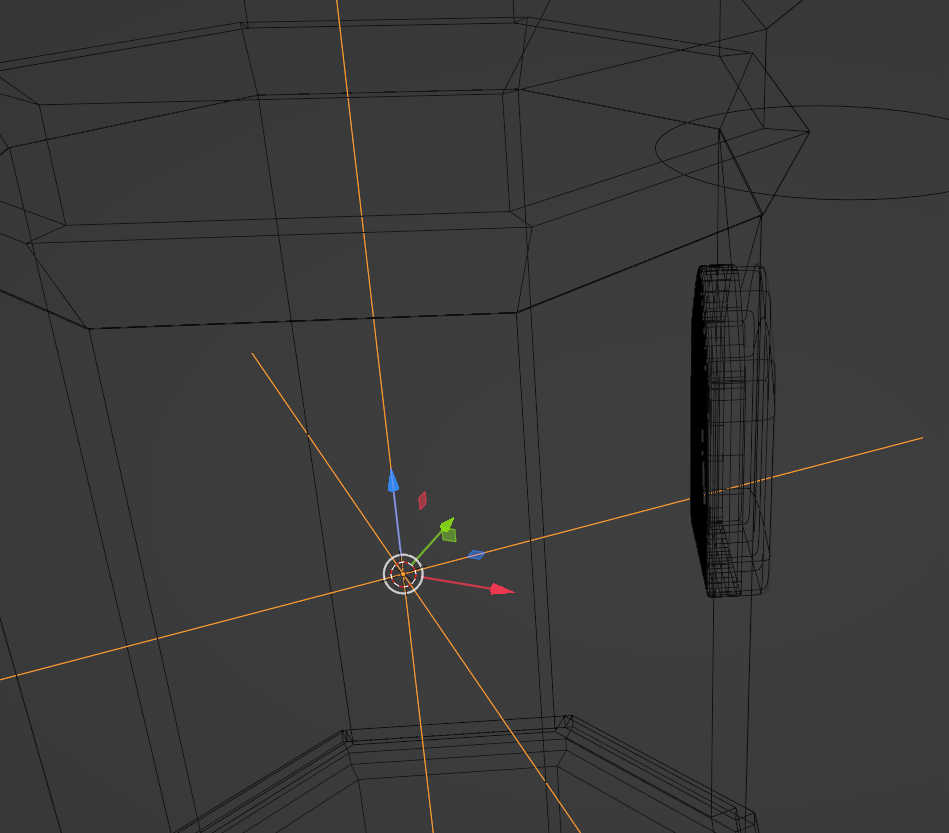
To get an array of the window, that are rotates around the tower, I placed the 3d cursor in the middle of the tower. Than I selected the window and move its origin to 3d cursor. I than spawn an empty plain axis object, to rotate around it. Because the origin and plain axis are now at the same position, the window will rotate around the axis in at same distance. Adding the array modifer to the window creates multibile instance of it. Type in the amount of 8 (Amount of faces) and select only object offset. Selecting plain axis as object, creates an offset scaling to the empty. Rotating the empty than rotates each member of the array around the empty, keeping the offset to the middle the same. The empty object needs to be rotate around 45° to have a window at each face.

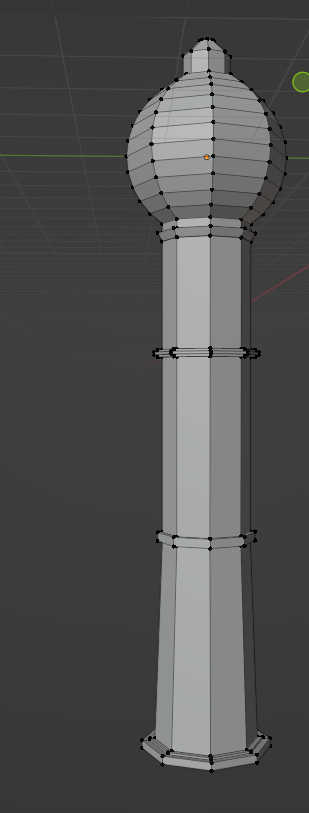
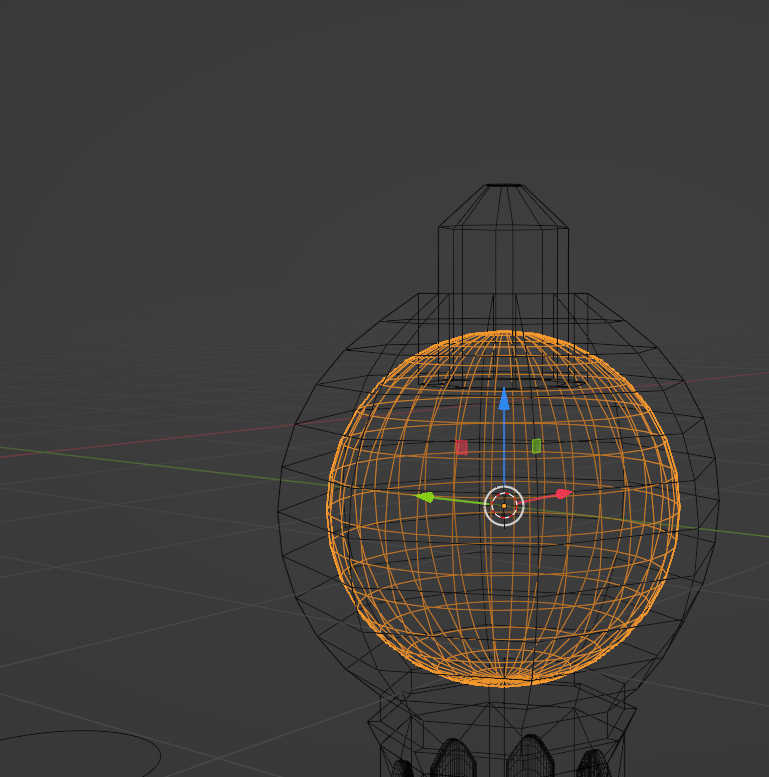
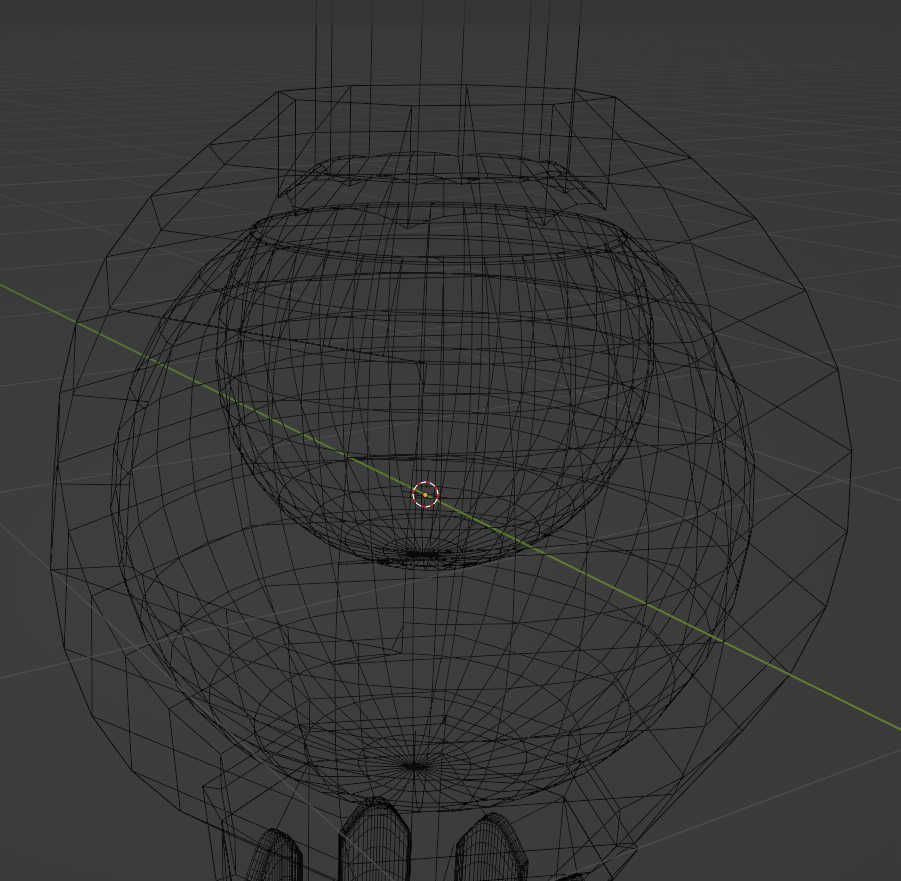
Placing the 3d cursor back at the origin of the tower, which is the center of the sphere, lets you create a second sphere to carve out the inside of the tower head. Add a boolean to the tower set to difference and select the new sphere. Than I created another smaller sphere inside the hollowed tower and use a boolean set to union to join it the tower. Last created a cylinder the support the weight of the sphere. Again I joined the geometry of the cylinder with a boolean using union.
For the last step I made a small cut inside the roof by extruding some faces from the top inside the roof. By applying each boolean I finished the tower.
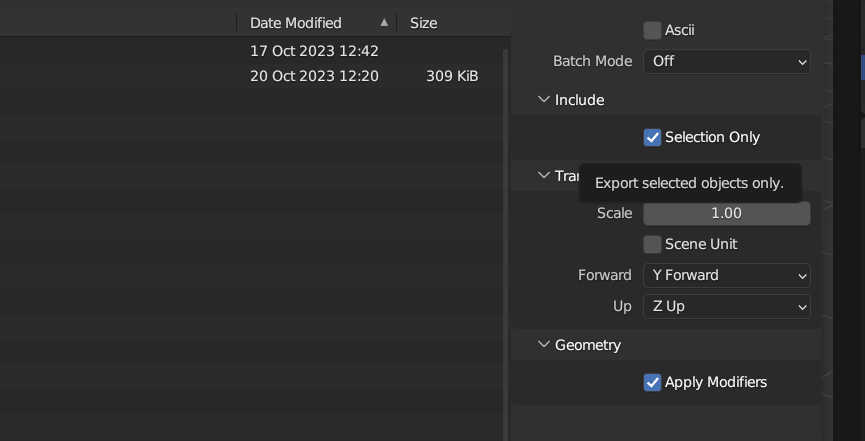
To print this model I exported it with blender using export > .stl and selecting “Selection only” to just export the selected object.
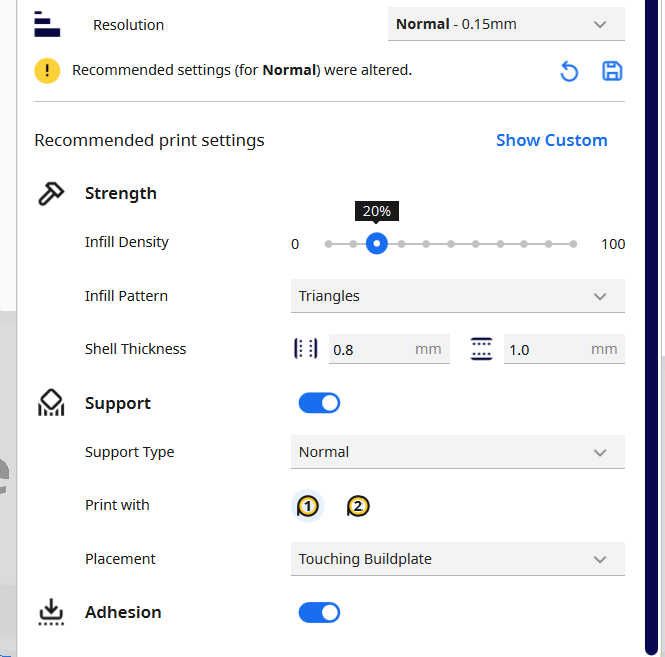
I than imported the file into “UltiMaker Cura” and set the scale to 140mm in the z direction. I didn’t need to reorient the model, because I already oriented on the right axis in blender. I set the printer to “Ultimaker S5”, to print on this printer. For the material setting I used the standard setting, because I wanted to print with PLA.


For the print setting I selected 20% Density, to print it as a decorative piece and reduces the print time. As an infill pattern I used the standard triangle pattern. I used normal type of support, which took less time than the tree approach. I also didn’t need the support Placement everywhere, because most angles like the wall were lower than 45°. I activated Adhesion to made the remove more easier from the print. As for the resolution I selected “normal” size with 0.15mm, which reduced the timer and didn’t change that much detail compared to the “fine” resolution.
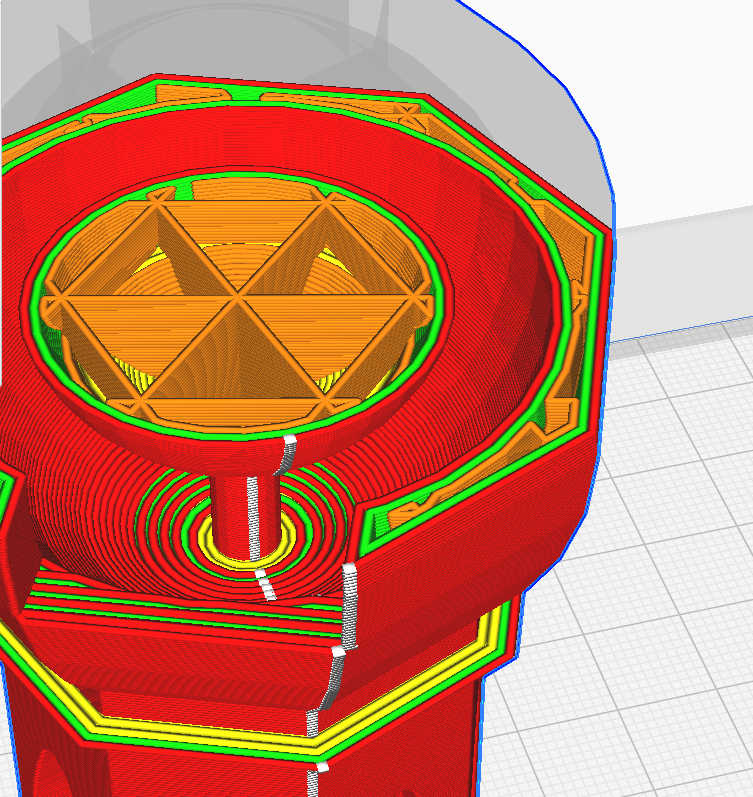
With the slicer I checked where each support would be placed, which mostly didn’t need to be placed. Looking inside the sphere doom everything seam to be fine.

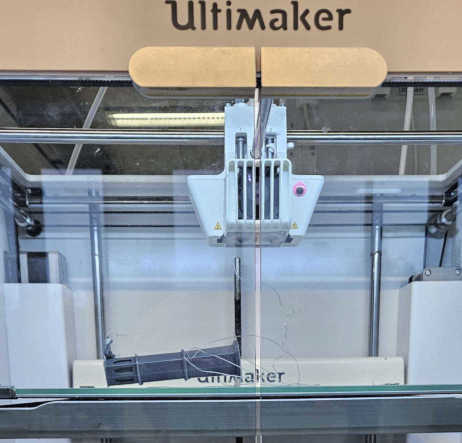
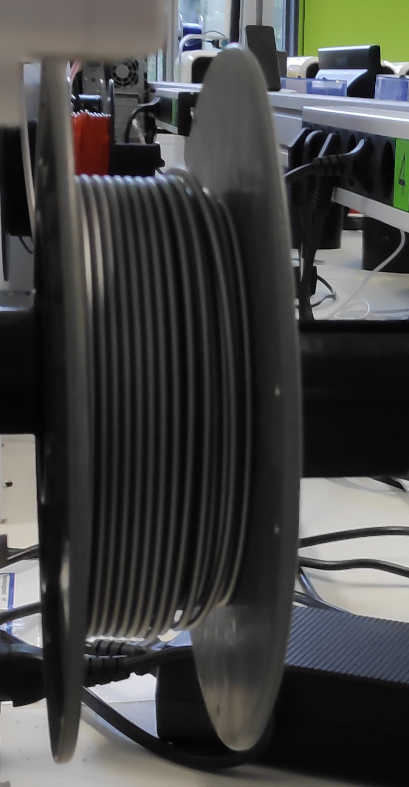
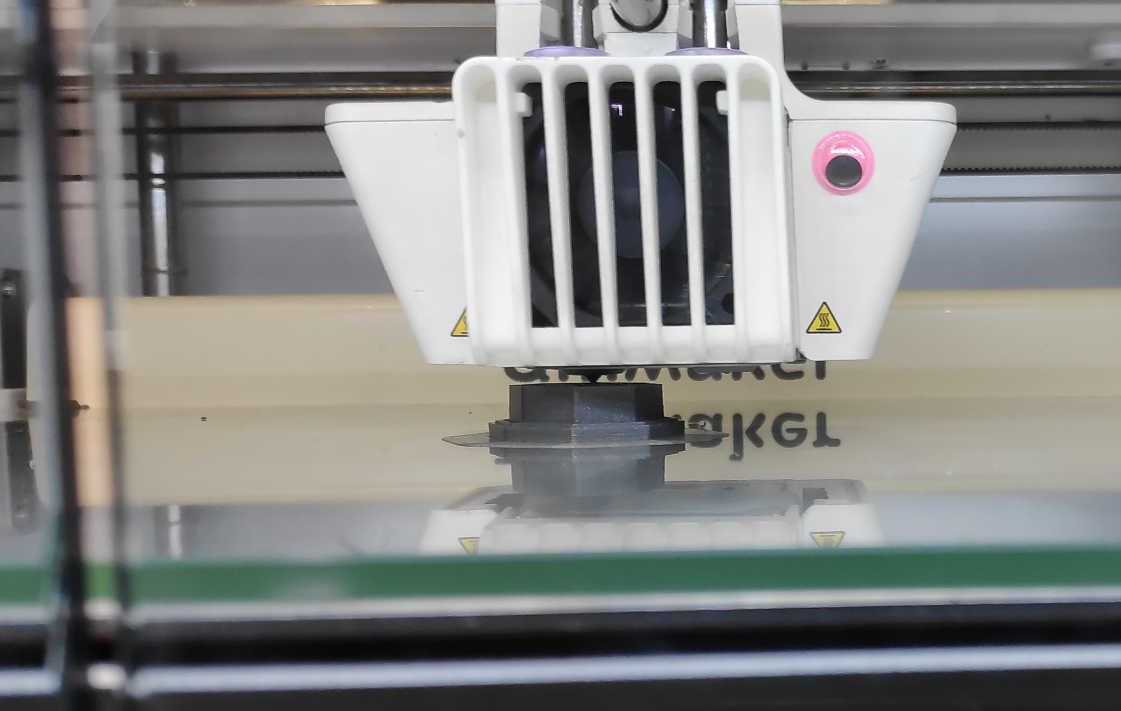
With that I saved the print file to a USB stick and plugged it into the 3d-printer. On the printer is selected the file and pressed print. I didn’t needed to replace the filament, because it was already hook up to a grey PLA filament. T he printer than firstly stared to calibrate itself to the print floor, which took around 2-3 min.
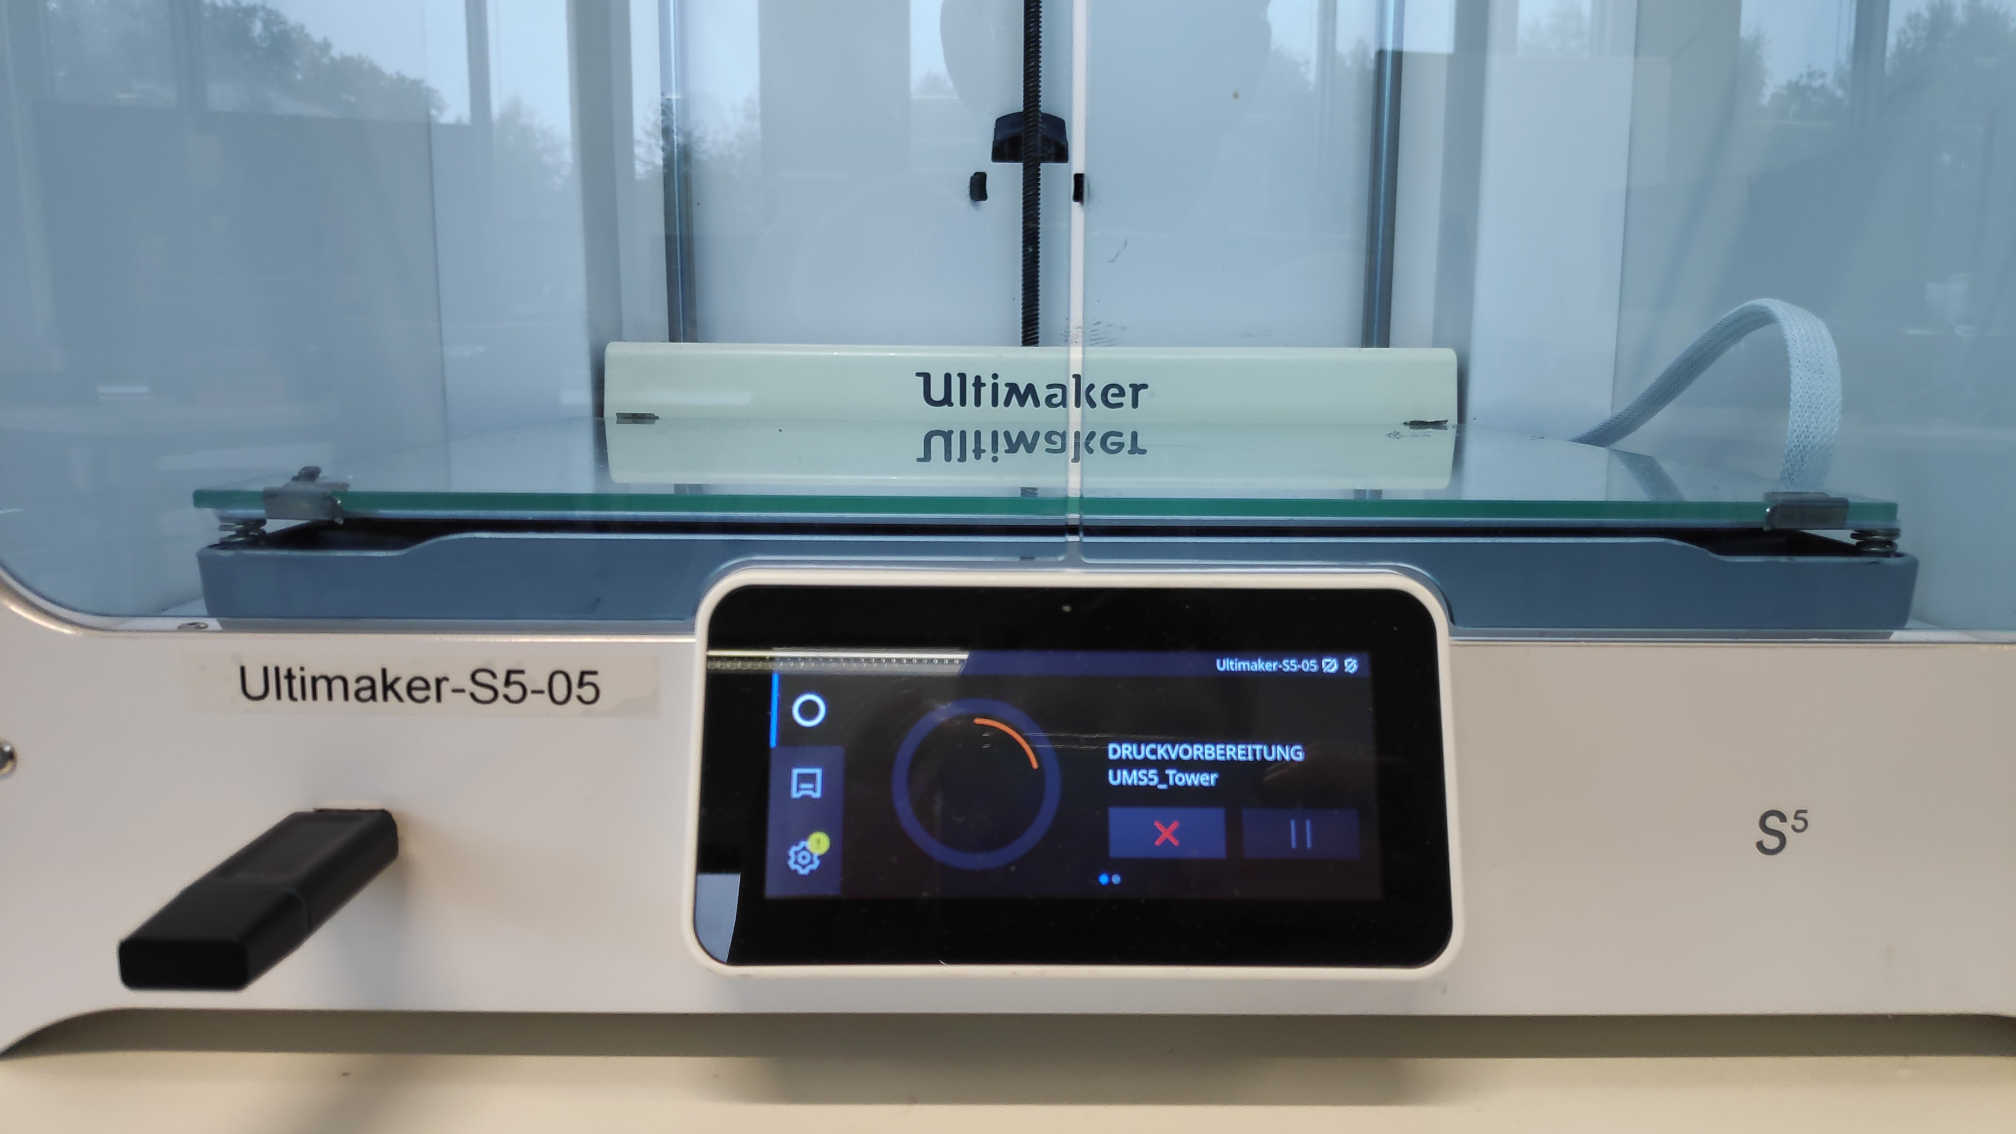
Few minutes later the printer began to print the first layer without a problems. I than left the printer alone to print, because there weren’t any layer bending or dripping of the print core. Only the top of the tower would crate a problem to print
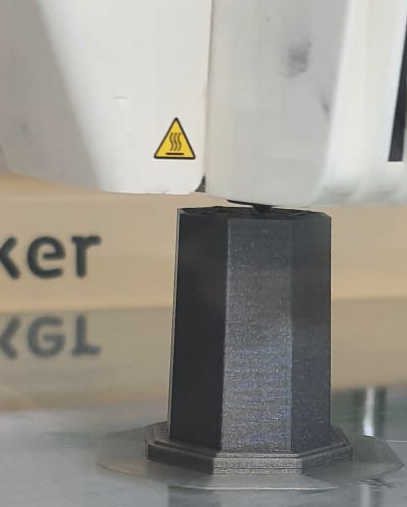
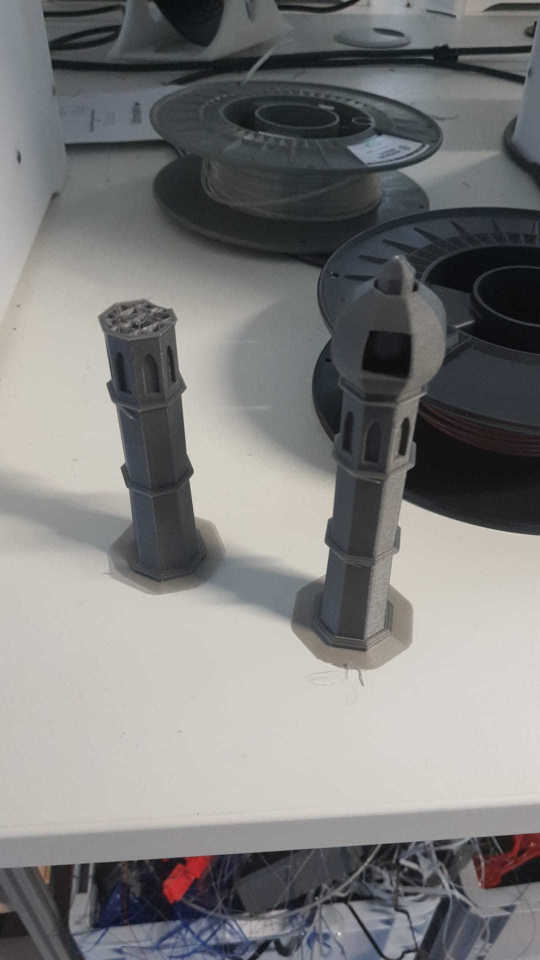
During the first print the tower tipped over do to probably missing its grip. So I needed a second attempted to start the print. The final result looks like this. Get the model here:
Tower.tls
Tower.blend
UMS5_Tower.ufp